
It’s been a while since I last made a post about photography. As I’ve mentioned elsewhere on the site, I’ve been learning how to retouch and restore photographs in Lightroom and Photoshop CC for some time now.
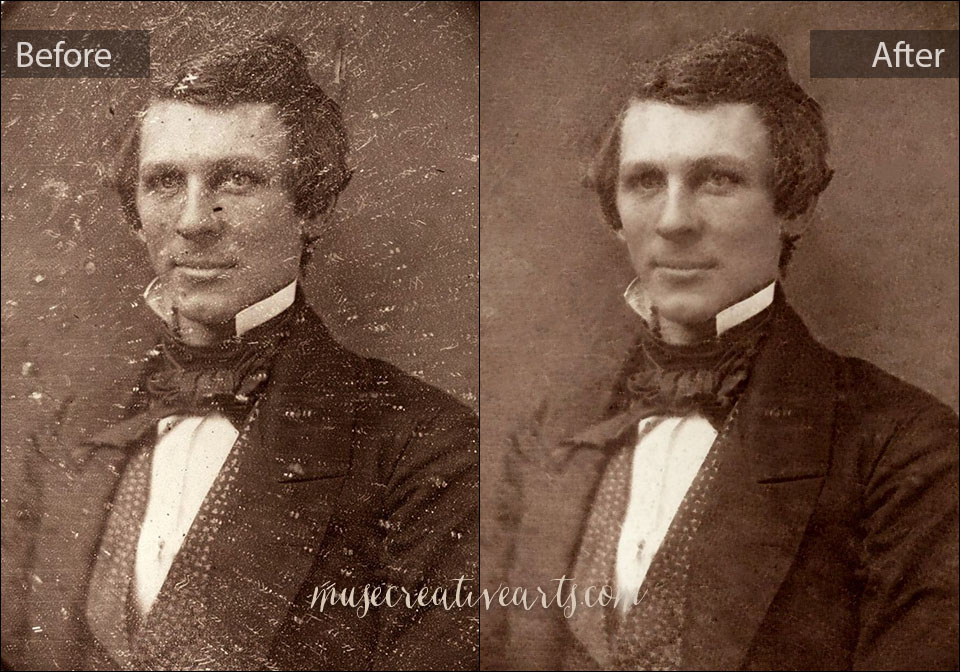
Having completed two online courses specifically about photo restoration, I wanted to test my skills in restoring an actual heritage family photo. The photo that I chose to work on is a copy of an ambrotype (a successor process to the better-known daguerreotype). This particular image is of my great-great-grandfather, Isaac (ca. 1850s). Thanks to my cousin Jon for the scan!
Steps (basic overview of the process):
- Assess the damage. With any old photo, the first step is to assess the damage. As you can see in the above before/after image, the original image (on the left) was in poor shape. There are obvious dirt marks, spots, and scratches, etc. to correct. I wanted a challenge and this particular photo suited my purpose very well. I did all of the editing in Photoshop CC. (Note: Lightroom is fabulous for editing images captured by digital devices, but Photoshop is needed for editing scans of photos taken on film or older media.)
- Healing Tools. Most of the work was done using the Spot Healing Brush and the Healing Brush tools. These were applied to fix the scratches and spots on the background, suit, hair, and face. I used the Healing Brush Tool to paint over the clips in the corners from the ambrotype. Also, late in the process I used the patch tool to fix his lapel (redefine the line/edge).
- Skin Smoothing. After doing the initial restoration work I thought that his face looked rather blotchy. To smooth the look of the skin just a little bit I applied a Surface Blur filter. I added a mask so that the effect would only show on his face. Then I lowered the opacity of the layer to make the effect very subtle.
- Brightening. The last step was to brighten the overall image. I could have accomplished this through various methods, but decided to add a combined pixel layer and then set the blend mode to Screen. Then I lowered the opacity. Voilà!
All in all I am very happy with how the restored photo turned out (the right side of the before/after image). Although more work could be done, the photograph is largely restored. Photo restoration involves very meticulous work, but is well worth the effort.